
How to Choose a Food Vacuum Sealer That Actually Fits Your Kitchen
Share:
-

-

-

-


Copied

Share:
-
-
-
-
Copied
Walk down the appliance aisle or scroll through Amazon long enough, and every vacuum sealer starts to look the same. They all promise airtight seals and longer-lasting food. But anyone who has actually used one knows the difference between a machine that earns its counter space and one that just collects dust comes down to a few practical details—not the spec sheet.
I've spent years working with kitchen appliance brands, and the questions that come up during product development are almost never about peak vacuum pressure. They're about how the machine behaves on a Tuesday night when you're portioning chicken for the freezer or sealing leftover soup. That's what this guide covers.
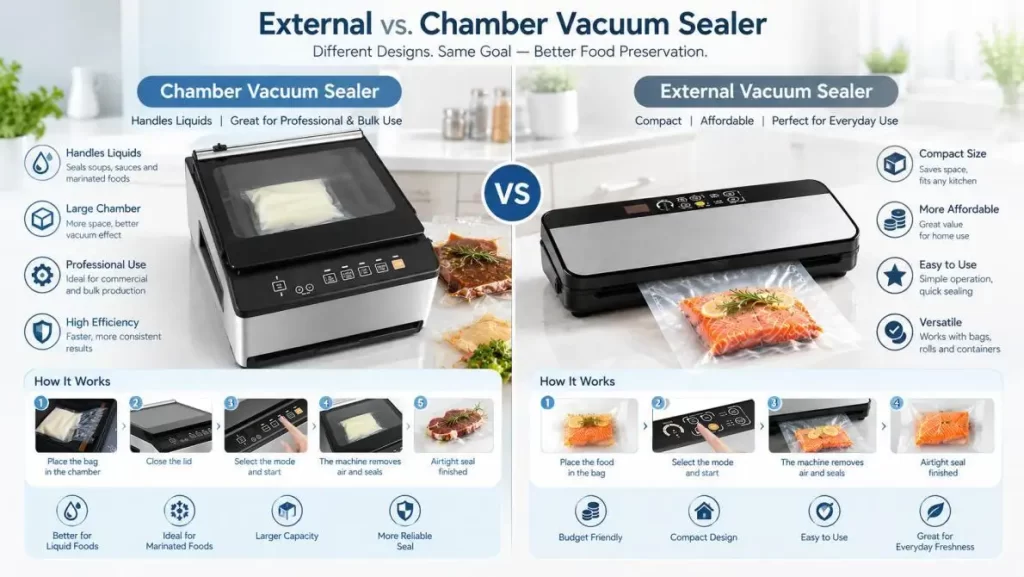
External vs. Chamber: Know the Difference First
External vacuum sealers are what most home kitchens use. You place the open end of the bag into the machine, and it pulls air out before heat-sealing the opening. They're compact, affordable, and fine for everyday use.
Chamber vacuum sealers work differently. The entire bag goes inside a chamber, and the machine removes air from the whole space before sealing. This design handles liquid-rich foods far better—soups, sauces, marinated meats—because there's no open channel pulling liquid toward the vacuum pump.
The trade-off is size and cost. For most households, an external sealer is the practical choice. For restaurants, serious meal-preppers, and anyone sealing a lot of wet food, a chamber model earns its keep.
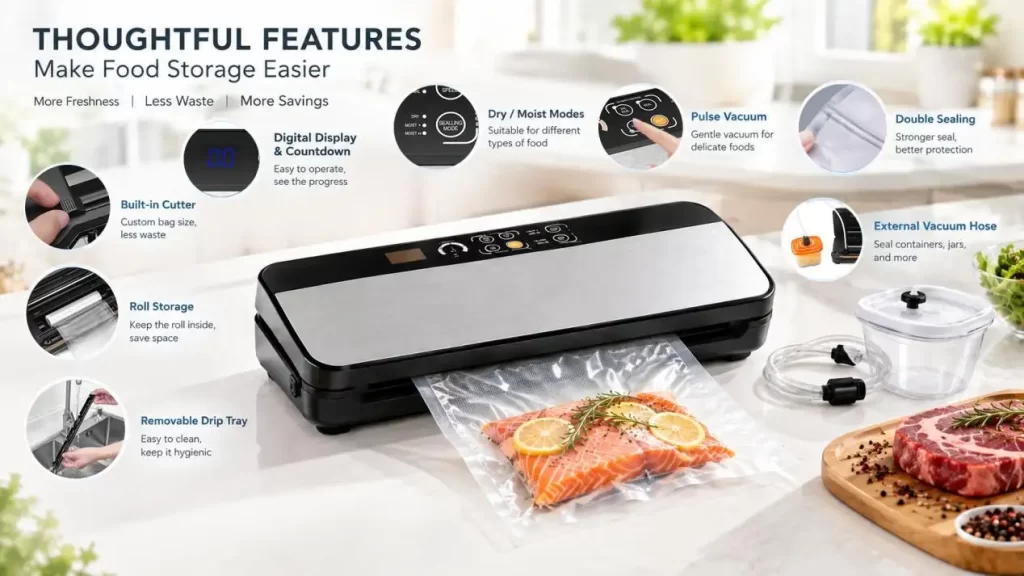
Features That Actually Matter
Dry and moist modes. This isn't marketing fluff. Moist mode adjusts the vacuum and sealing process for foods with juices. Without it, liquid gets pulled into the machine, and your seal suffers. If you seal meat, fish, or marinated anything, you want this.
Pulse control. Soft foods like berries, bread, and delicate pastries can get crushed by full vacuum pressure. Pulse lets you stop the vacuum when it looks right, so you seal without flattening.
Double sealing. One seal line can fail. Two gives you a backup. If you're freezing food for months, this matters more than you'd think.
Built-in cutter and roll storage. If you seal often, this saves real time. You cut custom bag sizes from a roll instead of buying pre-made bags, and the roll stays inside the machine rather than rolling around a drawer.
Removable drip tray. Moisture will get into the sealing area eventually. A tray you can pull out and rinse makes cleaning far less annoying—and a clean sealing area means better seals.
External vacuum hose. This one gets overlooked, but it extends what the machine can do. You can use it to vacuum-seal compatible containers, jars, or even wine bottles with the right attachments. If you want one appliance to handle bags and containers, look for this.
Digital display and countdown. Not essential, but genuinely useful. A countdown tells you how much time is left in the cycle, so you're not standing there guessing when it'll finish. On automatic models, the machine handles vacuuming and sealing in one pass, which reduces the number of buttons you have to think about.
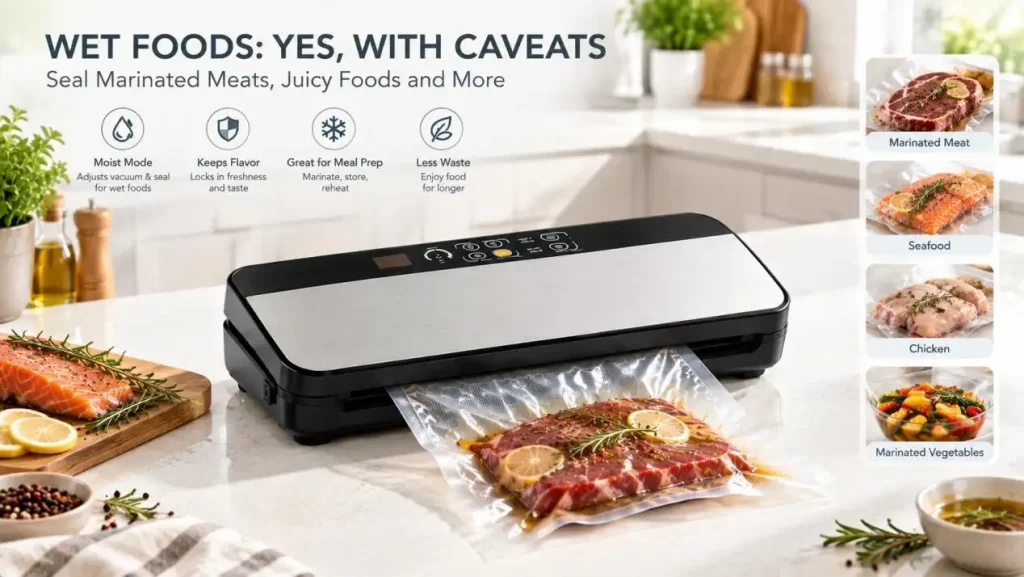
Wet Foods: Yes, With Caveats
You can vacuum seal wet foods, but large amounts of free liquid are a problem for external sealers. The liquid gets pulled toward the vacuum system, which can clog the machine and ruin the seal.
- For soups, sauces, and highly liquid foods: pre-freeze the liquid first, or use a chamber sealer.
- For marinated meats and juicy foods: vacuum sealers for wet food with a suitable moist mode can be a practical option.
- Keep the bag opening clean and dry. Liquid or food residue around the seal area is one of the most common reasons seals fail. Wipe the inside of the bag before sealing, and leave enough headspace between the food and the opening.
How to Use One Properly
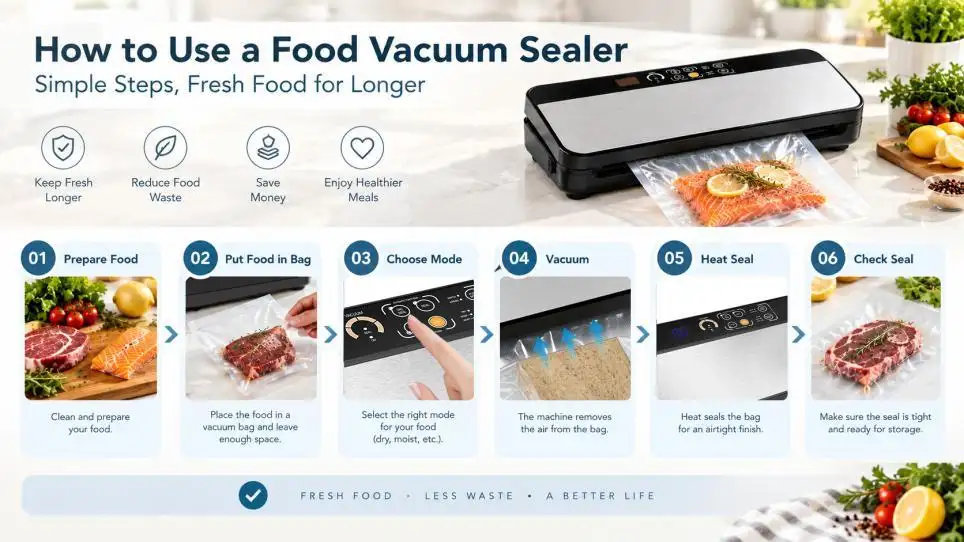
- Portion your food and pat off excess surface moisture.
- Use a bag designed for vacuum sealing. If cutting from a roll, seal one end first.
- Leave space between the food and the opening. Never let food sit directly on the sealing area.
- Choose the right mode—dry, moist, or pulse—based on what you're sealing.
- Start the cycle and let the machine vacuum and seal.
- Inspect the seal line. It should be continuous, with no wrinkles, gaps, or trapped food particles. If it's not perfect, reseal.
A Quick Word on Food Safety
Vacuum sealing removes air. It does not replace refrigeration or freezing.
- Perishable foods still need proper storage temperatures.
- Reducing oxygen doesn't make food shelf-stable at room temperature.
- Follow the same storage times you would for any perishable item.
Some vegetables also need blanching before long-term storage, and storage requirements vary depending on the vegetable. Vacuum sealing slows spoilage—it doesn't stop it.
For Brands and Retailers
If you're sourcing vacuum sealers for a private label or retail line, the questions change completely. You're no longer asking "which one should I buy?" You're asking "who can build this reliably, at scale, with the customization my market needs?"
That means evaluating:
- OEM/ODM capability
- MOQ and sample development timelines
- Production capacity
- Quality-control procedures
- Certifications
- Packaging customization
- Lead times
Product consistency across orders matters as much as the product itself. Working directly with a manufacturer that has real production experience—rather than a trading company—makes product development far smoother and reduces surprises at the factory level.
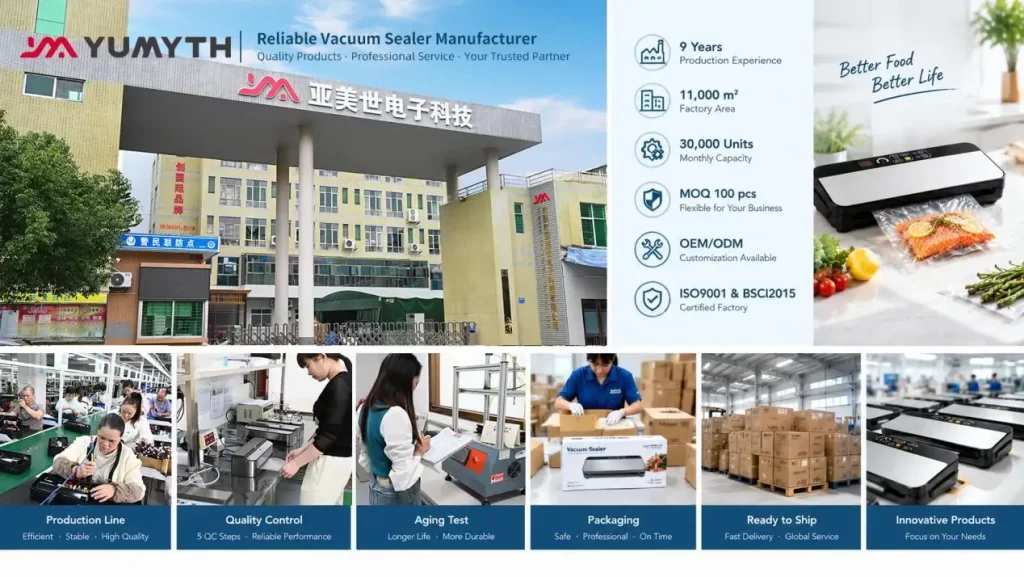
YUMYTH, for example, runs an approximately 11,000 m² manufacturing facility with around 9 years of production experience. Current capacity is roughly 30,000 units per month, with MOQ starting at 100 pieces for suitable projects. Standard samples can typically be prepared in about 7 days, while bulk production runs around 35 days depending on customization. Before shipment, products go through a pre-shipment sample check and five QC stages. The factory holds ISO9001 and BSCI 2015 certifications.
For brands entering the vacuum sealer category, that kind of structure supports everything from initial product testing through customized mass production—without having to piece together multiple suppliers. Customization can cover brand logo, product appearance, user manual, product stickers, outer carton, packaging, and product configuration, so the final product matches your target market rather than a generic retail unit.
Frequently Asked Questions
Is a vacuum sealer actually worth buying?
If you freeze meat in bulk, prep meals ahead, or buy food in large quantities, yes. It reduces freezer burn and keeps portions organized. If you mostly eat fresh food within a few days, you probably don't need one.
Can you vacuum seal meat and fish?
Yes, and it's one of the most common uses. Just remember they still need refrigeration or freezing.
Can you vacuum seal vegetables?
Yes, but some need blanching first for long-term storage.
Can you use vacuum-sealed bags for sous vide?
Yes, provided the bags and sealing system are rated for the cooking temperature.
What's the single most important feature?
There isn't one. For most home users, it's the combination of reliable sealing, suitable vacuum control, wet-food handling, and easy cleaning.
The Bottom Line
There's no single best vacuum sealer. A family freezing bulk meat has different needs than someone doing weekly meal prep, and a brand developing a product line has different needs still.
Focus on four things:
- Reliable sealing
- Suitable vacuum control
- Wet-food handling
- Easy cleaning
Those four determine whether you'll actually use the machine or leave it in a cupboard. Everything else is secondary.
Related Articles

Household Slush Machine: What to Know Before Buying One in 2026
2026-09-24
BY YUMYTH
A household slush machine makes frozen drinks at home. It works differently from a blender. A blender crushes ice into your drink, which adds water and waters down the flavor. ...

How Does a Nugget Ice Maker Work? A Look Inside the Ice-Making Process
2026-09-24
BY YUMYTH
Nugget ice looks simple enough. Small, soft pieces of ice drop into the bin, ready to go into a glass. But making that texture is quite different from making a ...
Nugget Ice Maker for Coffee Shop: How Ice Texture Affects Coffee
2026-09-24
BY YUMYTH
When choosing a Nugget Ice Maker for a Coffee Shop, there are many factors to consider aside from the rate of ice production. At YUMYTH, we consider the downstream implications ...
Why Nugget Ice for Soda Creates a Different Mouthfeel Than Traditional Ice Cubes
2026-09-24
BY YUMYTH
At YUMYTH, we believe there is more to Nugget Ice for Soda than just the effect on temperature. The structure of ice also changes the perception of carbonation, how quickly ...