How should a sample be evaluated before mass production?
Share:
-

-

-

-


Copied
Share:
-
-
-
-
Copied
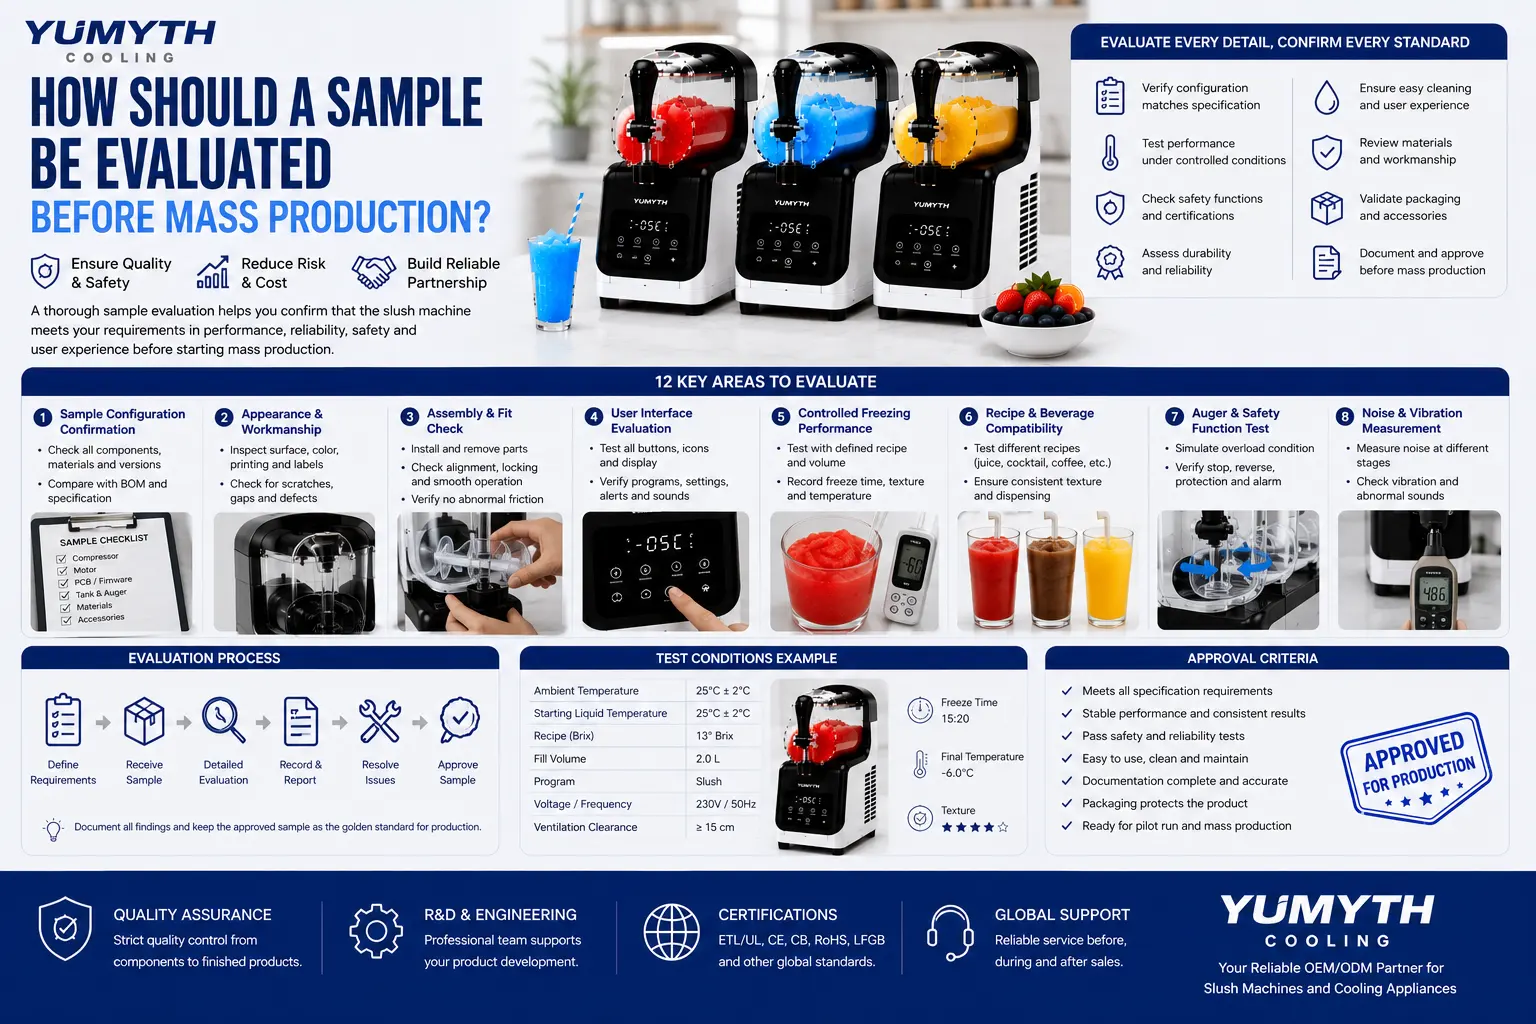
Samples of slush machines are not suitable for mass production just because they look good or because they have been briefly demonstrated in the factory. The approved sample serves as the basis for the specification of the process of tooling, materials, performance, quality checks, packaging and future orders of production.
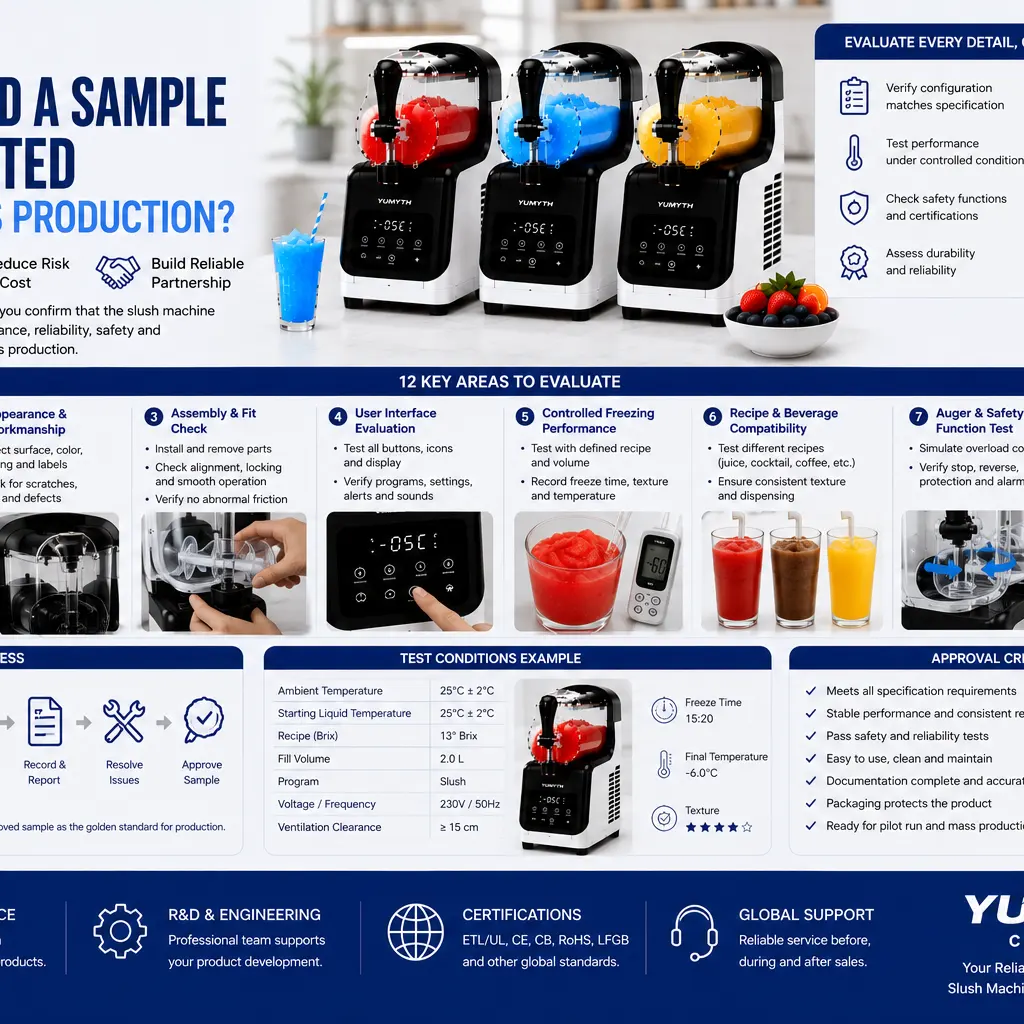
A sample might appear good but fail to have the right freezing capabilities, generate too much noise, be difficult to clean, have leaking seals, software that might not be correct or not have the necessary certification paperwork. Once materials are bought, and the line is up and running, these issues run up in cost.
A structured sample evaluation is a process that helps appliance brands validate that the product is going to satisfy commercial, engineering, safety, and user-experience expectations prior to mass production.
Check the Sample Configuration
Before the buyer receives the sample, it is important to check with him to know exactly what type of sample he has received.
An early engineering prototype might feature 3-D printed parts, temporary wiring, modified housings or nonproduction materials. It can be used to assess product ideas, but should not be used as a reference for production.
A mass production approval sample should be used the following:
- System of compressor and refrigerant;
- * Pump and hose; and
- * Motor and gearbox;
- * PCB and firmware;
- * Food-contact materials;
- A power cord and a plug;
- * Finishes and finishes materials;
- Labels and control panel artwork;
- * Packaging and accessories.
The supplier should give a list of samples that shows part numbers, material specifications, firmware version and any differences between the sample configuration and the intended production model.
Any temporary components which are not resolved should be replaced prior to final approval.
Now compare the sample with the product specification.Now compare the sample to the product specification.
An important requirement should be included in a controlled product specification.
The buyer is advised to check:
- * Primary current rating and current ratings at different frequencies; and
- * Rated power;
- * Working and maximum capacity;
- * refrigerant size; and
- * Product dimensions;
- * Net weight;
- * Noise target;
- * Preset programs;
- * Supported recipes;
- * Cleaning method;
- * Safety functions;
- * Included accessories.
It should also specify the measures used to assess performance. “Slush Ready in 15 minutes” isn't complete without the beverage volume, starting temperature, ambient temperature, Brix level, selected program, and final texture definition.
If there is any deviation from the specification, record it and agree to it with the client before it is approved.
Check for Appearance and Workmanship
It is important that the exterior inspection be performed under standard lighting conditions and be compared to approved colour and appearance standards.
Inspectors to look for:
- * Scratches;
- * Color differences;
- * Uneven panel gaps;
- * Misaligned printing;
- * Loose components;
- * Plastic molding marks;
- * Sharp edges;
- * Visible screws;
- * Damaged transparent parts;
- * Incorrect labels.
There should be no cracks, clouding, black spots, molding flash or distortion in the beverage tank. The lid, dispensing handle, drip tray and control panel are evenly fitted.
What's more, the sample should be checked from the back, sides, bottom and inside of removable parts. The approval for cosmetics should not be based just on the front facial image captured for product photography.
Determine Assembly and Component Fit
All removable components should be installed and removed several times.
The buyer should ensure that:
- The tank securely locks;
- * The auger is easily joined;
- * The lid closes correctly;
- Seals are in place;
- The dispensing valve is not overly pressured to work;
- * The drip tray is stable;
- It is difficult to install components backwards.
The assembly should be intuitive. Users should not have to exert excessive force or to repeatedly refer to the manual to position basic cleaning parts.
There should also be an inspection for rubbing between the auger and tank. If the parts shrink and contract as a result of abnormal contact, the situation may worsen.
To test the Complete User Interface, press the Test button.
All buttons, indicators, displays, programs, alerts and settings should be tested.
Evaluation will include the following:
- * Power-on and shutdown;
- * Program selection;
- * Appearance or mood changes; and
- * Child lock;
- * Cleaning mode;
- * Completion alerts;
- * Error messages;
- *Power fault and recovery;
- * Display readability.
All button names and icons must be the same as in the firmware. When the panel is “Frozen Cocktail” the program should have been validated for an approved alcohol range.
The customer is to note the versions of the PCB and firmware. During the manufacture, the factory shall make use of the same approved versions, unless otherwise a subsequent change has been formally reviewed and validated.
Carry out the controlled freezing tests.Perform the controlled freezing tests.
Use a documented test method to evaluate cooling performance and not an informal recipe.
The following should be controlled during the test:
- * Ambient temperature;
- * Starting liquid temperature;
- * Beverage volume;
- * Brix level;
- When including alcohol, provide alcoholic content.If applicable, include alcohol content.
- * Supply voltage;
- * Ventilation clearance;
- * Selected program;
- Slush-ready texture is defined as a texture that is sufficiently fine to be slushed into a mold.
Important results include:
- * Time to first ice formation;
- * Time to dispensable slush;
- * Final beverage temperature;
- * Texture consistency;
- * Compressor cycling;
- * Auger behavior;
- * Holding stability.
The sample should be tested at minimum, nominal and maximum working volumes. If a machine has a good performance with a small quantity of liquid, the same machine will have poor performance with a full tank.
Several cycles should be completed to confirm repeatability.
Research to identify the most effective beverage formulation.Experiment with various beverage formulas.
Only one laboratory sugar and water solution is not going to be used by consumers. The sample should be tested using recipes applicable to the target market.
These may include:
- * Fruit juice;
- * Carbonated drinks;
- * Coffee beverages;
- * Reduced-sugar drinks;
- * Dairy-based mixtures;
- * Mocktails;
- * Alcoholic cocktails.
All recipes must be within the product's declared operating range.
The assessment should determine if the machine's texture is smooth, it dispenses continuously and does not freeze hard or stop the auger from turning. If recipes are not supported they should be clearly indicated as such in the manual.
Verify Auger Protection
During engineering testing, the auger system should safely react to a thickened mixture and/or a controlled blockage.
The purchaser is responsible for checking if the machine:
- * Measures abnormal motor loads;
- Stops or pauses the auger;
- * Reverses automatically;
- * Interrupts compressor cooling;
- * Provides a handy alert;
- Prevents re-starting of unsafe restarts.
The testing method used to check for jam protection should be controlled, and not random objects should be put in the tank to test for jam protection.
Once the Obstruction is removed, the machine should be safe and return to its normal condition without permanent damage, unusual noise or leakage.
Measure Noise and Vibration
Remember, the noise does not have to be measured only when the machine has liquid in it, it should be measured throughout the entire freezing cycle.
This can happen with the loudest condition during the process of ice formation, final texture development, dispensing, or during automatic cleaning.
Listen for:
- * Compressor impacts;
- * Fan contact;
- * Auger scraping;
- * Gearbox knocking;
- * Cabinet vibration;
- * Refrigerant-flow sounds;
- * Loose removable parts.
If the product has been declared with the noise value, the measurement condition should define the acoustic quantity, the distance of the microphone, the operating stage, the recipe and the ambient environment.
Even though the average levels are comparable, a smooth sound may be more acceptable than clicking or high frequency tones that occur intermittently.
Test Leakage and Dispensing
Sample should be filled and checked for leakage around:
- * Tank joints;
- * Seal rings;
- * Dispensing valve;
- * Nozzle;
- * Tank-to-base interface;
- * Condensation drainage areas.
The valve should open and close evenly and completely so that it does not drip after it has closed.
Leakage tests are to be repeated after dismounting, cleaning and remounting the components. This will assist in identifying seal orientation issues and challenging assembly interfaces.
A representative frozen texture should be used for the dispensing test and should confirm a consistent beverage flow.
Evaluate the Cleaning and Reassembly process
Repeat use is greatly affected by cleaning performance.
- The Buyer is to carry out the entire process:
- 2. Squeeze out all of the liquid.
- 2. Run the rinse program, when available.
- 3. Take the tank, auger, valve, lid, seals and drip tray out of the tank.
- 4. Clean all food contact surfaces.
- Rinse and dry parts.
- 6. Reassemble the appliance.
- 8. Carry out a leak and function test.
Active cleaning time, number of loose components, tools needed, trapped residue, difficult grooves, water retention and assembly errors should be recorded on the evaluation.
Automatic rinse should not be used as complete cleaning unless validated for this use.
Review materials and documentation
The supplier is responsible to provide evidence that substantiates the sample materials.
These may include:
- * Food-contact declarations;
- * Material specifications;
- * Critical component certificates;
- * Electrical safety reports;
- * EMC reports;
- * Refrigerant information;
- * Bill of materials;
- * Wiring diagrams;
- * User instructions.
The model number, supplier, ratings and materials listed in the documents should be the same as those of the inspected sample.
When the construction of the product has changed, a general certificate will not be accepted.
Evaluate Durability
One pass is not a guarantee of long-term reliability.
The repeated should be included in the validation plan:
- * Auger operation;
- * Compressor cycling;
- * Dispensing-handle use;
- * Tank removal;
- * Seal installation;
- * Cleaning;
- * Button operation;
- * Power interruption.
Cracks, deformation, looseness, leakage, surface damage and increased noise should be checked for on high-wear parts.
The number of durability cycles and the conditions should be determined by the expected durability of the product and level of risk.
Study of Packaging and Transport Protection
The production-representative sample should be packed in the carton, with the inserts, accessories, manuals and labels as specified in the carton.
The buyer is advised to check:
- * Movement of product between cartons; and
- The protection of the tank and handle;
- * Compressor-base support;
- * Accessory placement;
- * Carton strength;
- * Unboxing sequence;
- Some packaging dimensions and gross weight.
Following the drop, vibration, or transport test the appliance must be subjected to another visual, electrical, leakage, and freezing test.
If the carton appears OK after the impact, it does not guarantee that the refrigeration system is not damaged.
Set up clear approval criteria.
The use of a checklist for sample approval should include the following categories: pass, fail and conditional approval.
Issues that need discussion should be:
- * Problem description;
- * Required correction;
- * Responsible party;
- * Completion date;
- * Retest requirement;
- * Final approval status.
Don't rely on verbal closing of a deal instead of written closing.
Once the sample is accepted the buyer and supplier should sign the gold sample or formally designate it as the golden sample. Photos, specifications, firmware, color, test results and packaging information should be kept together.
Compare the sample of your work to the approved sample.
The approved development sample is not a definitive example of manufacturing consistency.
The golden sample should be compared with the unit(s) from the pilot run for:
- * Appearance;
- * Dimensions;
- * Freezing performance;
- * Noise;
- * Leakage;
- * Firmware;
- * Labels;
- * Packaging.
Final tooling, approved supplier, production operators and planned inspection should be used on pilot units.
Mass production should only be started after a factory has proved to be capable of producing the approved design consistently through pilot production.
Conclusion
A slush machine sample must be assessed as a system, not just a pretty machine!
The buyer should check the configuration, appearance, assembly, refrigeration performance, recipe compatibility, noise, leakage, cleaning, durability, safety documents and packaging. Each requirement shall have controlled specifications and repeatable tests.
The final approved sample should be the golden sample to be used for pilot production, quality inspection and future changes in components.
In order to achieve a smooth sample approval process, more time must be invested prior to production, but it will save on wasted efforts of redesigning, different batches, certification issues, warranty issues, and shipment delays.
Related Articles
How We Test Every Ice Maker Before Packaging
2026-09-15
BY YUMYTH
A step-by-step look at refrigerant handling, cooling verification, leak detection, corrective action and electrical safety testing For an ice maker, reliable performance is determined long before the carton is sealed. ...
Guide for Brands Looking for a Reliable Vacuum Sealer OEM Supplier
2026-09-14
BY YUMYTH
When you are sourcing kitchen appliances for your retail brand, finding a dependable vacuum sealer OEM supplier is rarely just about getting the lowest unit price. It is about protecting ...
Why Ice Shape Matters: Understanding 10mm × 15mm Cylindrical Nugget Ice
2026-09-14
BY YUMYTH
More Than Ice Production — The Ice Itself Shapes the Consumer Experience When sourcing a nugget ice maker, buyers often focus first on production capacity, water tank size, ice basket ...

Ice Maker Sourcing Guide: How to Find the Right Factory
2026-09-10
BY YUMYTH
Sourcing an ice maker looks straightforward on paper. Find a supplier, agree on a price, place an order. But anyone who has actually done this knows the process is rarely ...