
Vacuum Sealer for Meal Prep: Portioning and Freezer Storage Guide
Share:
-

-

-

-


Copied
Share:
-
-
-
-
Copied
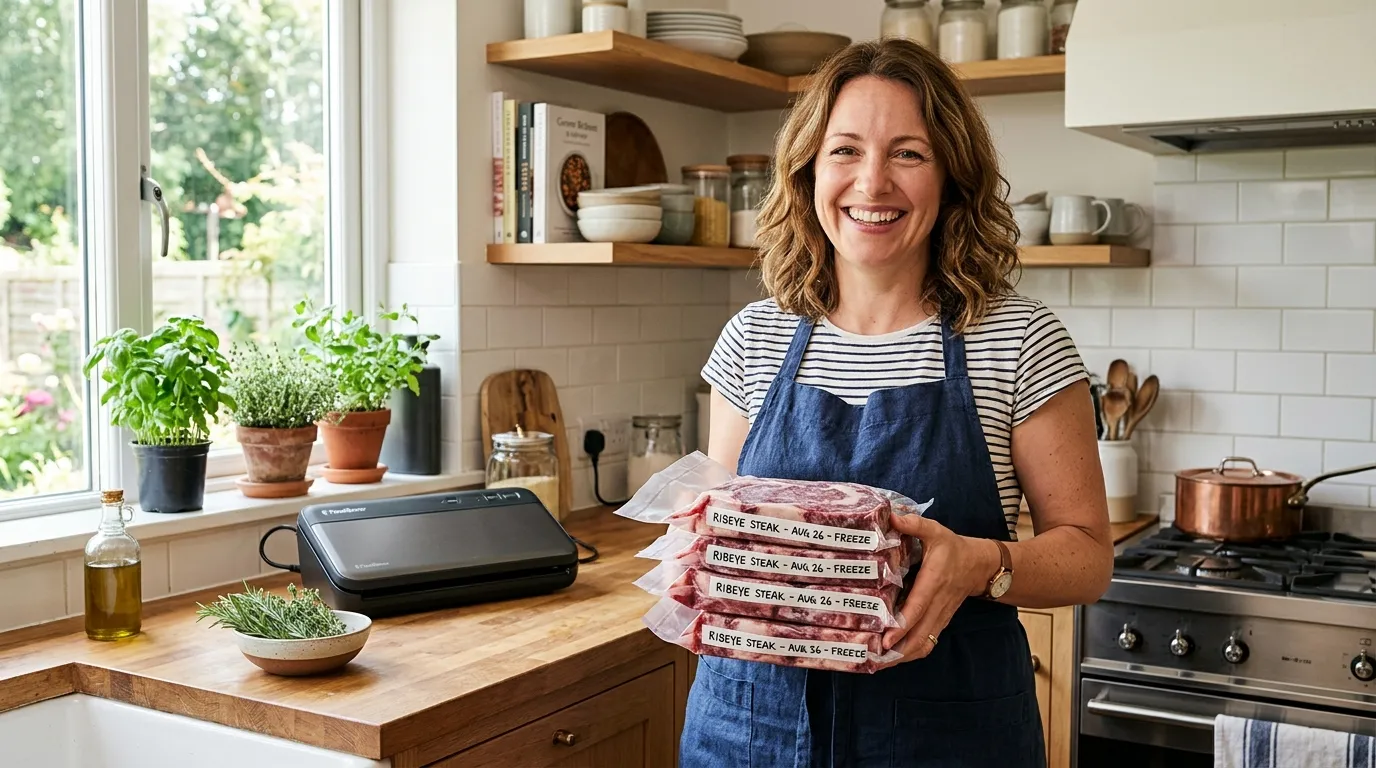
A vacuum sealer can make meal prep easier by dividing a large batch into practical portions, reducing air inside each package, and creating flatter packs that are easier to organize in a freezer. It works best when portion size, food moisture, packaging type, and future reheating method are planned before sealing begins.
Vacuum sealing does not sterilize food or make cooked meals shelf-stable. Prepared food still needs prompt cooling, cold storage, safe thawing, and proper reheating. The most reliable workflow is simple: plan the portion, cool the food safely, choose compatible packaging, seal it correctly, label it, and freeze it for its intended use.
Is Vacuum Sealing a Good Fit for Your Meal-Prep Routine?
Vacuum sealing is particularly useful for people who cook several meals at once or divide bulk ingredients into smaller quantities. It can support:
-
Individually portioned lunches or dinners
-
Family-size freezer meals
-
Separately packed proteins, grains, vegetables, and sauces
-
Raw marinated ingredients prepared for later cooking
-
Bulk meat, fish, or other ingredients divided into cooking-size portions
Removing much of the air from a package can help reduce oxidation, moisture loss, and exposure that contributes to freezer burn. It also creates compact packages that can be frozen flat and stacked.
However, not every meal responds equally well to full vacuum pressure. Bread, soft vegetables, delicate baked foods, and loosely arranged meals may become compressed. Bones, hard frozen corners, or sharp ingredients can puncture a bag. Liquid-rich meals also require extra preparation because sauce can move toward the vacuum channel before the bag is sealed.
Vacuum sealing is therefore most effective when the process is adapted to the food rather than using the same automatic cycle for every package.
Choose the Portion Format Before You Choose the Bag
The right portion is not simply the amount that fits inside a bag. It should match how the meal will be thawed, reheated, and served.
Before packaging a batch, consider:
-
How many people will eat each portion
-
Whether the entire package will be used at once
-
Which components reheat at similar rates
-
Whether sauce should remain separate
-
How much freezer space is available
-
Whether the food will be reheated in a pan, oven, microwave, or another container
An oversized package may force you to thaw more food than needed. A package containing several components may also create uneven reheating if the protein, vegetables, and sauce require different treatment.
Single-Serving, Family-Size, or Component Portions?
| Portion format | Best suited to | Main advantage | Main trade-off |
|---|---|---|---|
| Single serving | Individual lunches, changing schedules, controlled portions | Thaw only what one person needs | Requires more bags and sealing cycles |
| Family size | Shared dinners and meals used at one time | Fewer packages and faster batch preparation | The whole package normally needs to be thawed |
| Separate components | Proteins, grains, vegetables, and sauces used in different combinations | Greater flexibility and better texture control | Requires more labeling and freezer organization |
| Complete meal | Meals with components that freeze and reheat well together | Convenient ready-to-thaw package | Less flexibility if one component reheats poorly |
For example, cooked chicken and rice may work in one package if they will always be reheated together. A crisp vegetable or liquid sauce may be better stored separately so it does not affect the texture of the other components.
Match the Meal to the Right Package and Sealer
Package selection depends on food moisture, portion shape, delicacy, and the type of vacuum sealer being used.
External suction machines remove air through the open end of the bag. They generally need textured or embossed bags that contain small channels through which air can travel. These countertop machines are practical for dry foods, solid cooked meals, and moderately moist portions when the liquid is controlled.
Chamber vacuum sealers reduce pressure around the entire pouch. They can use smooth chamber pouches and are more suitable when liquid-rich meals need to be packaged frequently. Their practical limitations include chamber dimensions, machine size, and the amount of workspace required.
Rigid vacuum containers are another option for delicate foods that may be crushed in a bag. They can also help with foods that contain too much liquid for convenient external suction sealing.
| Meal condition | Suitable packaging approach | Important consideration |
| Dry, firm portion | Textured vacuum bag with an external sealer | Keep the seal area clean and flat |
| Moist cooked meal | Textured bag with pulse or moist control | Cool first and stop liquid before it reaches the channel |
| Soup, curry, or sauce | Pre-frozen bag, rigid container, or chamber pouch | Do not attempt to seal hot liquid |
| Soft or crushable food | Rigid container or controlled pulse vacuum | Avoid excessive compression |
| Irregular portion sizes | Vacuum bag roll | Cut each package to match the portion |
| Repeated equal portions | Pre-cut bags | Faster and more consistent during batch work |
A tabletop vacuum sealer is usually the most accessible format for ordinary home meal prep, but the correct choice still depends on the types of food being sealed.
Pre-Cut Bags or Rolls for Batch Portioning?
Pre-cut bags are convenient when most portions are similar. There is no need to cut the material or seal one end before filling, which can make a large weekly batch faster to complete.
Bag rolls allow the length of each package to be adjusted. This is useful when one session includes small protein portions, larger family meals, and long or irregularly shaped ingredients. A roll can also reduce unnecessary empty material when portions vary significantly.
The practical decision is based on consistency:
-
Choose pre-cut bags for repeated portions of a similar size.
-
Choose rolls when package dimensions regularly change.
-
Use both when meal preparation includes standard lunches and occasional larger packs.
Some YUMYTH models include roll storage and an integrated cutter, but these are model-specific features rather than standard features across every machine.
External Suction or Chamber Sealing?
Neither machine type is universally better.
An external suction sealer is generally the more practical option for dry foods, solid meals, and ordinary weekly preparation. It occupies less counter space and works well when liquids can be pre-frozen or controlled with pulse operation.
A chamber machine becomes more useful when soups, sauces, marinades, and other liquid-rich foods make up a large part of the workload. Because the pressure changes around the complete pouch, the machine can handle liquids differently from a standard external system.
Choose based on:
-
How often liquid meals are packaged
-
Available counter or storage space
-
Required pouch dimensions
-
Number of packages sealed in each session
-
Preferred bag type
-
Cleaning and maintenance requirements
How to Vacuum Seal Meal-Prep Portions for Freezing
A reliable package begins before the machine starts. Cooling, filling, positioning, sealing, and inspection all affect the result.
1. Cool Cooked Food Promptly
Do not leave cooked food on the counter until it gradually reaches room temperature. Perishable meals should be cooled and refrigerated promptly.
For large batches:
-
Divide the food into smaller quantities.
-
Place it in shallow containers so heat can escape faster.
-
Refrigerate it within two hours.
-
Keep the refrigerator at 40°F/4°C or below.
-
Begin vacuum packaging only after the food has cooled sufficiently for the chosen method.
These practices follow FoodSafety.gov guidance for safe chilling and storage. Vacuum packaging cannot correct unsafe cooling that occurred before the food entered the bag.
2. Fill the Bag Without Contaminating the Seal Area
Choose a package large enough for the food and the machine’s sealing position. Leave sufficient unused material above the portion so the open end can lie flat across the sealing bar.
While filling:
-
Keep sauce, oil, crumbs, and food particles away from the opening.
-
Fold the top edge outward temporarily if that helps keep it clean.
-
Wipe away moisture before placing the bag in the machine.
-
Spread the opening flat without folds or wrinkles.
-
Move bones or sharp frozen corners away from the film.
A very large bag wastes material and freezer space, but a bag that is too short may not leave enough clean material for a reliable closure.
3. Select the Mode and Stop Point for the Food
Use a standard automatic cycle for dry, firm portions that are unlikely to deform.
For soft or moist food:
-
Use pulse or manual vacuum control where available.
-
Stop suction before delicate components become excessively compressed.
-
Use a moist-food setting when the model provides one.
-
Pre-freeze highly liquid food instead of relying only on a moist setting.
-
Keep the package positioned so liquid must travel farther before reaching the vacuum channel.
Selected YUMYTH machines include pulse operation and dry or moist modes. These controls can help with meal-prep variation, but they do not compensate for an oily, wet, or wrinkled sealing area.
4. Inspect the Seal Before Freezing
Examine the closure immediately after the cycle.
A usable seal should appear continuous, flat, and free from trapped food. Check for:
-
Wrinkles crossing the sealing line
-
Wet or oily areas
-
Gaps or uneven sections
-
Food particles inside the closure
-
Visible punctures elsewhere in the bag
If enough clean bag material remains, create another seal above the first one. Replace the package if it has been punctured or if contamination cannot be removed.
A second sealing line may provide additional protection on compatible machines, but it cannot repair poor bag preparation.
5. Label, Freeze Flat, and Rotate
Every package should be identifiable without opening it.
A useful label can include:
-
Name of the meal
-
Preparation or freezing date
-
Number of servings
-
Raw or cooked status
-
Thawing instructions
-
Reheating note, when appropriate
Lay flexible packages flat during the initial freezing stage. Once firm, they can be stacked horizontally or stored upright like files. This arrangement uses space efficiently and makes individual portions easier to retrieve.
Keep the freezer at 0°F/-18°C or below, and place newer packages behind or beneath older ones so earlier meals are used first.
How to Seal Soups, Sauces, Curries, and Other Moist Meals
Liquid-rich meals are among the most difficult foods to handle with an external suction machine. As air leaves the package, liquid can move toward the opening and interfere with both the vacuum channel and the sealing bar.
The most reliable external-sealer method is pre-freezing:
-
Cool the meal safely.
-
Place the required portion in a container or unsealed bag.
-
Freeze it until the liquid becomes firm.
-
Transfer or reposition it in the final vacuum bag.
-
Vacuum seal the solidified portion.
Pulse control can work for thick sauces or moderately moist meals because the operator can stop suction before liquid reaches the top. Rigid vacuum containers can protect delicate food and keep free liquid away from a bag opening.
A chamber machine may be more practical when liquid pouch sealing is frequent. Readers working regularly with soup, curry, marinades, or sauce can review the dedicated guide to choosing and using a vacuum sealer for liquids.
Never seal hot soup or sauce. Apart from food-safety concerns, heat and steam can interfere with air removal and the sealing process.
Keep Vacuum-Sealed Meal Prep Safe During Storage, Thawing, and Reheating
Vacuum packaging reduces air but does not destroy bacteria. It can create a reduced-oxygen environment, so refrigeration, freezing, sanitation, and temperature control remain essential. The University of Minnesota Extension notes that reduced-oxygen packaging requires appropriate controls because certain microorganisms can remain a concern when food is mishandled.
Use these boundaries for household meal prep:
-
Keep refrigerated food at 40°F/4°C or below.
-
Keep frozen food at 0°F/-18°C or below.
-
Under general household guidance, use cooked refrigerated leftovers within four days.
-
Do not assume vacuum packaging extends cooked leftovers to two refrigerated weeks.
-
Thaw food in the refrigerator, in cold water using a safe method, or during cooking as appropriate.
-
Do not thaw perishable meals on the counter.
-
Reheat cooked leftovers to 165°F/74°C.
These limits are supported by FoodSafety.gov guidance for cooked leftovers and the USDA’s safe thawing recommendations.
Freezer storage guidance often describes quality rather than the point at which continuously frozen food suddenly becomes unsafe. Different meals retain acceptable texture and flavor for different periods. Use the government-backed FoodKeeper resource for food-specific storage recommendations instead of relying on one universal vacuum-sealed storage table.
Do not heat or boil food in a vacuum bag unless the bag manufacturer specifically confirms that the material is suitable for the intended temperature and cooking method.
Common Meal-Prep Vacuum-Sealing Problems and Their Causes
| Problem | Likely cause | Corrective action |
| Air returns after sealing | Wrinkle, contaminated seal area, incomplete closure, or puncture | Inspect the full bag, clean and flatten the opening, then reseal or repackage |
| Liquid enters the vacuum channel | Food is too warm or liquid, suction is uncontrolled, or the bag is overfilled | Cool the food, pre-freeze it, reduce the portion, or use pulse control |
| Food becomes crushed | Automatic vacuum removes too much air for a delicate item | Use pulse control, stop earlier, or switch to a rigid container |
| Seal opens during freezing | Moisture, oil, food particles, or folds prevented proper sealing | Dry and flatten the opening, then create a new seal on clean material |
| Bag develops a small leak | Bone, sharp ingredient, or hard frozen edge punctured the film | Reposition or protect sharp areas and replace the damaged bag |
| Freezer burn appears | Air entered through a leak, the seal failed, or storage quality declined over time | Inspect packaging before freezing and rotate older meals first |
If moisture repeatedly reaches the machine, cleaning access becomes an important feature. A removable drip tray or accessible vacuum channel can reduce maintenance time, but the better solution is still to control the food before starting the vacuum cycle.
Which Vacuum Sealer Features Matter Most for Meal Prep?
Maximum vacuum pressure is not the only specification that matters. For mixed weekly preparation, control and usability may affect results more than the strongest automatic suction setting.
Prioritize features according to the food being prepared:
-
Pulse or manual control: Useful for soft food and moist portions.
-
Moist-food mode: Helpful for damp food conditions on compatible models.
-
Built-in cutter and roll storage: Convenient when package sizes change frequently.
-
Suitable bag width: Must accommodate the largest normal portion.
-
Accessible vacuum channel or removable drip tray: Simplifies cleanup.
-
Accessory connection: Allows compatible rigid containers to be used.
-
Consistent seal control: Important during repeated batch preparation.
-
Chamber capacity: Relevant when liquid-rich pouch sealing is frequent.
-
Practical repeated-cycle operation: Matters when many portions are sealed in one session.
A modern vacuum sealer may combine several convenience and control features, but every function should be checked at the individual model level.
YUMYTH offers both external and chamber-style systems, while selected models include roll storage, cutters, pulse control, moisture settings, accessory hoses, and removable drip trays. Readers can review the broader vacuum sealer range after identifying which features their meal-prep routine actually requires.
Meal-Prep Vacuum-Sealing Checklist
Before placing the next batch in the freezer, confirm that you have:
-
Selected single, family-size, component, or complete-meal portions
-
Planned how each package will be thawed and reheated
-
Cooled cooked food promptly
-
Chosen packaging compatible with the machine
-
Pre-frozen liquid-rich food where necessary
-
Kept the bag opening clean, dry, and flat
-
Used pulse or moisture controls appropriately
-
Checked the complete sealing line
-
Labeled the food, date, quantity, and status
-
Frozen flexible packages flat
-
Stored food at the correct temperature
-
Planned a safe thawing and reheating method
The best vacuum sealer for meal prep is the one that matches the actual workload. Dry individual portions may need only a reliable external machine, while frequent soups, sauces, or high-volume batches may justify stronger liquid control or chamber operation. For model selection, sourcing, or configuration questions, use YUMYTH’s product inquiry page to discuss the intended foods, packaging format, and batch requirements.
Related Articles
How We Test Every Ice Maker Before Packaging
2026-09-15
BY YUMYTH
A step-by-step look at refrigerant handling, cooling verification, leak detection, corrective action and electrical safety testing For an ice maker, reliable performance is determined long before the carton is sealed. ...
Guide for Brands Looking for a Reliable Vacuum Sealer OEM Supplier
2026-09-14
BY YUMYTH
When you are sourcing kitchen appliances for your retail brand, finding a dependable vacuum sealer OEM supplier is rarely just about getting the lowest unit price. It is about protecting ...

Why Ice Shape Matters: Understanding 10mm × 15mm Cylindrical Nugget Ice
2026-09-14
BY YUMYTH
More Than Ice Production — The Ice Itself Shapes the Consumer Experience When sourcing a nugget ice maker, buyers often focus first on production capacity, water tank size, ice basket ...

Ice Maker Sourcing Guide: How to Find the Right Factory
2026-09-10
BY YUMYTH
Sourcing an ice maker looks straightforward on paper. Find a supplier, agree on a price, place an order. But anyone who has actually done this knows the process is rarely ...